Posts

Showing posts with the label editing

Creating a Simple Vignette Effect

Image
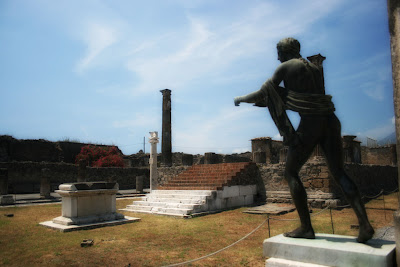
I find that my pictures tend to look better with a slight vignette (when the corners are darker than the center of the picture) because it draws the attention to the center: In this post, I'll discuss three separate ways to create a vignette effect in Photoshop, with a few pros and cons of each. I'll go over the steps briefly, so please email me or leave a comment if you want more detailed directions. Method 1: Solid Color Gradient Method 2: Levels Gradient Method 3: Burning First of all, I'll start with the following picture as the base: Method 1: Solid Color Gradient The simplest way to create a vignette is to apply a solid black color over the picture and fade it out as it gets closer to the center: To create this effect: Create a new layer above your base layer and fill it with black. Create a layer mask on that layer. Choose the gradient tool, and make a gradient that consists of the following: black from 0-50%, fade black to white from 50-100% (this will make the fad...

Coloring Smoke

Image
Yesterday I posted an article ( Photographing Smoke ) about taking pictures of smoke. This article will explain how to add color to your smoke pictures. This was the picture I ended with yesterday: 1. Open your picture file in Photoshop (or a similar program). 2. Create a new layer. 3. Use the brush tool to paint colors over your smoke in a new layer (color can be applied in other ways too; try using the gradient tool to fade from one color to another). 4. Apply a Gaussian Blur to your color layer (to blend the colors together). 5. Set the color layer's blend mode to Color (you can also try Soft Light , Overlay , or any other mode for a variety of color styles). Feel free to experiment with combinations of colors, coloring techniques, and blend modes. And try inverting the final product. Here are some of mine: The above is inverted without adding color. The above is using a circular rainbow gradient. Again, you can see the rest of my Smoke set on Flickr.com.

Hard Light

Image
So I'll start this blog off with a quick post about using the blend mode known as hard light . If you've used the layer feature in Adobe Photoshop , you probably know that there are a multitude of blend modes , from normal to overlay to soft light , among many others. These blend modes can be used for a variety of effects, including special effects as well as simple photo touch-up. I like to use the hard light blend mode to brighten up my pictures (usually landscape or nature photographs). Adobe describes hard light as follows: Multiplies or screens the colors, depending on the blend color. The effect is similar to shining a harsh spotlight on the image. If the blend color (light source) is lighter than 50% gray, the image is lightened, as if it were screened. This is useful for adding highlights to an image. If the blend color is darker than 50% gray, the image is darkened, as if it were multiplied. This is useful for adding shadows to an image. Painting with pure black o...